

How to Make Cafe Quality Coffee at Home Step by Step
Table of Contents
- Step 1: Start With Fresh Beans and the Right Equipment
- Step 2: Find the Best Coffee Bean to Water Ratio
- Step 3: How to Grind Coffee Beans for Different Brewing Methods
- Step 4: The Importance of Water Quality in Coffee Brewing
- Step 5: Brew, Bloom, and Dial In Your Cafe Quality Coffee
- Step 6: How to Froth Milk at Home Without a Machine
- Troubleshooting Flavor and Gear: Budget vs. Pro Setups
- Conclusion: Your Cafe Quality Coffee Routine Starts Here
- Frequently Asked Questions
Last Updated: September 16, 2026
Step 1: Start With Fresh Beans and the Right Equipment
Cafe quality coffee at home starts with two non-negotiables: freshly roasted beans and a burr grinder. Everything downstream, from grind size to extraction, depends on these.

Freshly roasted beans matter because coffee begins degassing within days of roasting, releasing carbon dioxide that interferes with even extraction. A common mistake is buying supermarket bags with no roast date. Look for a printed roast date, not a "best by" date, and use beans within two to four weeks.
Equipment essentials for home baristas:
- Burr grinder (hand or electric): produces consistent particle size
- Digital scale: weighs beans and water in grams for repeatability
- Gooseneck kettle: controls pour rate and agitation
- Filter paper or metal filter, depending on method
- Thermometer or temperature-controlled kettle
Everline Coffee roasts in small batches and prints roast dates on every bag, so you know exactly where your beans sit in that window. The Specialty Coffee Association's brewing standards outline the extraction targets professional baristas work toward.
A blade grinder is the single biggest upgrade most home brewers can make. It chops beans unevenly, producing both dust and boulders that extract at wildly different rates.
Step 2: Find the Best Coffee Bean to Water Ratio
The best coffee bean to water ratio for most brewing methods is 1:15 to 1:17 by weight, meaning one gram of coffee to 15-17 grams of water. Start at 1:16 and adjust from there.
This is the golden ratio range that most specialty roasters and competitions build around. Weigh everything. Volume scoops vary with bean density and grind, which is why a scale removes guesswork.
| Brew Method | Coffee (g) | Water (g) | Ratio |
|---|---|---|---|
| Pour-over | 20 | 320 | 1:16 |
| French press | 30 | 500 | 1:17 |
| AeroPress | 15 | 220 | 1:15 |
| Moka pot | 18 | 200 | 1:11 |
If the cup tastes weak or sour, tighten the ratio toward 1:15. If it tastes bitter or harsh, loosen it toward 1:17. Change one variable at a time so you know what caused the shift.
Step 3: How to Grind Coffee Beans for Different Brewing Methods
Grind size is the most powerful variable you control. Finer grinds expose more surface area and extract faster; coarser grinds slow extraction down.
How to grind coffee beans for different brewing methods:
- French press: coarse, like sea salt
- Pour-over: medium-fine, like table salt
- AeroPress: fine to medium-fine, adjustable by steep time
- Moka pot: fine, slightly coarser than espresso
- Espresso: very fine, tuned to your machine
Consistency matters more than the exact setting.
Step 4: The Importance of Water Quality in Coffee Brewing
The importance of water quality in coffee brewing is easy to underestimate: brewed coffee is roughly 98% water, so off-flavors in your tap water land directly in the cup. But the deeper issue most guides skip is water chemistry, the dissolved minerals that do the actual extracting. This is the single biggest gap between home coffee and cafe coffee, and it is where a masterclass approach separates itself from a basic how-to.
A practical target range most specialty practitioners work toward:
- Total dissolved solids (TDS): roughly 75-125 ppm for brew water
- Magnesium: the workhorse mineral for fruity, bright extraction
- Calcium: contributes body and sweetness, but scale buildup in kettles
- Alkalinity (bicarbonate): the buffer that resists acid, too high and coffee tastes dull and chalky
- Sodium: keep low; it flattens flavor
- pH: near neutral, around 7
A simple baseline for dialing in your water:
- Start with filtered tap water, or bottled water labeled low in sodium
- Avoid distilled or reverse-osmosis water unless you add minerals back, pure water extracts poorly
- If your filtered water still tastes flat, a remineralization packet or a pinch of Epsom salt and baking soda in a gallon can restore the missing ions
- Keep brew water between 195-205°F
- Rinse your filter with hot water before brewing to remove paper taste
Step 5: Brew, Bloom, and Dial In Your Cafe Quality Coffee
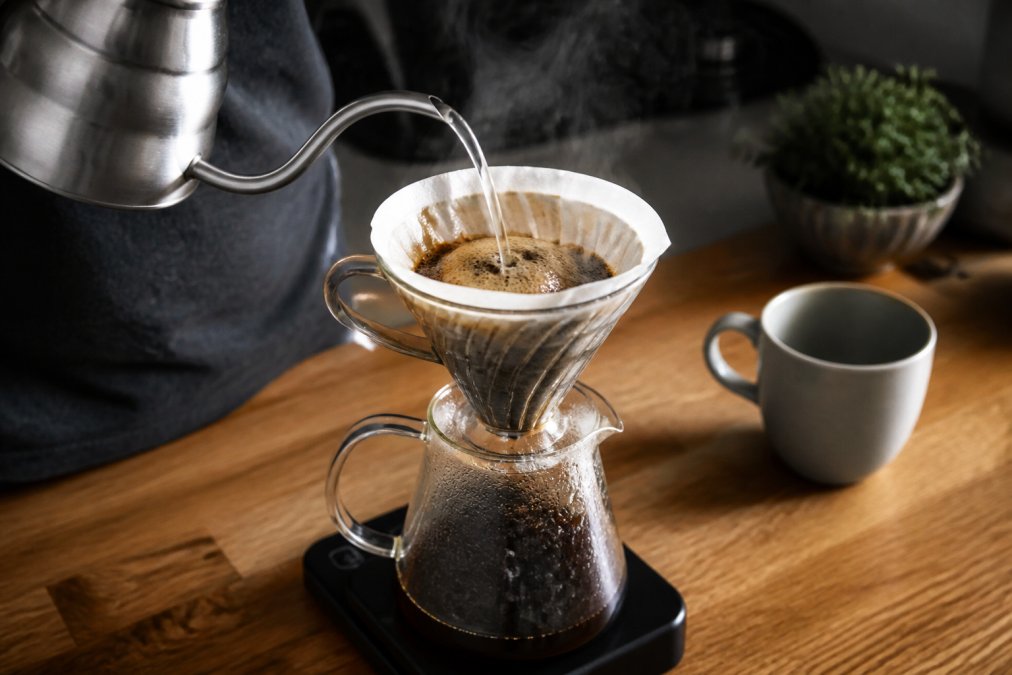
Brewing cafe quality coffee at home comes down to three moves: bloom the grounds, pour with control, and taste-adjust. Skip any one and the cup suffers. But the third move, taste-adjust, is where most guides stop short. They tell you to bloom and pour, then leave you guessing when the cup tastes wrong. The real skill is a feedback loop: taste, diagnose, change one variable, repeat.
The taste-diagnosis loop
This is the part competitors skip. When a cup is off, don't guess, read the flavor and map it to a cause:
- Sour, sharp, thin, salty: under-extracted. The water moved through too fast or too cool. Grind finer, raise water temperature, or extend brew time.
- Bitter, harsh, drying, ashy: over-extracted. Grind coarser, lower temperature, or shorten contact time.
- Flat, papery, hollow: water chemistry or stale beans. Check your water minerals and the roast date.
- Both sour and bitter at once: uneven extraction, usually a grind consistency problem. Fix the grinder before touching anything else.
- Inconsistent cup to cup: unmeasured pours or an inconsistent grinder. Weigh your water and lock your technique.
Change one variable at a time
Dialing in is a controlled experiment. Pick one lever, grind size is the most powerful, and move it in small steps. A common pattern is to adjust grind by one or two clicks on a hand grinder, brew again, and taste. If the cup improved, keep going the same direction; if it overshot, back off half a step. Only touch ratio or temperature after grind is dialed.
Step 6: How to Froth Milk at Home Without a Machine
You can froth milk at home without a machine using three low-tech methods, and each produces a different texture.
- French press: heat milk to 140-155°F, pour into the carafe, pump the plunger 20-30 times for a light, airy foam.
- Jar and lid: fill a mason jar halfway, shake hard for 30 seconds, then microwave 30 seconds to set the foam.
- Whisk or frother: warm milk in a saucepan and whisk vigorously, or use a handheld battery frother for microfoam.
Troubleshooting Flavor and Gear: Budget vs. Pro Setups
Most home brewers don't need pro gear to hit cafe quality. They need to diagnose what's actually wrong with the cup.
Troubleshooting flavor profiles:
- Sour, thin, salty: under-extracted. Grind finer, raise water temperature, or extend brew time.
- Bitter, harsh, drying: over-extracted. Grind coarser, lower temperature, or shorten contact time.
- Flat or papery: water quality or stale beans. Filter your water and check the roast date.
- Inconsistent cup to cup: grind inconsistency or unmeasured pours. Fix the grinder first.
Budget-friendly vs. pro-gear workflows:
| Setup | Grinder | Brewer | Scale | Best For |
|---|---|---|---|---|
| Budget | Hand burr grinder | French press or AeroPress | Basic 0.1g scale | Beginners, small kitchens |
| Mid-tier | Electric burr grinder | Pour-over dripper | Timed scale | Daily ritual, consistency |
| Pro | Flat burr grinder | Espresso machine | Refractometer + scale | Enthusiasts chasing precision |
Conclusion: Your Cafe Quality Coffee Routine Starts Here
Consistency is the real challenge. Anyone can brew one great cup; repeating it every morning takes fresh beans, a repeatable ratio, and a grinder you trust.
Frequently Asked Questions
What is the 15-15-15 rule for coffee?
The 15-15-15 rule is a simple brewing guideline: use a 1:15 coffee-to-water ratio, let the coffee bloom for 15 seconds, and aim for a total brew time of about 15 minutes for cold brew or 1.5 to 3 minutes for hot methods. It helps beginners start with a balanced cup before adjusting variables. For hot pour-over, a 1:15 ratio with a 30-second bloom and 2.5-minute total brew time is a solid starting point.
Does water temperature affect coffee flavor?
Yes, water temperature directly changes extraction. Water between 195°F and 205°F extracts the sweetness, acidity, and body that make cafe quality coffee taste balanced. Below 195°F, the coffee tastes sour and weak because fewer flavor compounds dissolve. Above 205°F, it turns bitter and harsh. Use a kettle with a thermometer or a variable-temperature kettle to stay in that range every time.
Why should you weigh your coffee beans instead of using scoops?
A scoop measures volume, not mass, so the same scoop can hold different amounts depending on bean size, roast level, and how the beans settle. Weighing with a digital scale in grams removes that guesswork. For the best coffee bean to water ratio, weigh both coffee and water. A 1:15 ratio means 20 grams of coffee to 300 grams of water. That precision is what makes your cup taste the same every morning.
How do I froth milk at home without a machine?
You can froth milk with a French press, a mason jar, or a small whisk. Warm the milk to about 140°F, pour it into a French press, and pump the plunger rapidly for 20 to 30 seconds until the volume increases. For a mason jar, fill it halfway, seal it, and shake hard for 30 seconds, then microwave for 30 seconds. Whole milk or oat milk froths best because of the fat and protein content.